Replacing your RV roof insulation is a practical way to boost comfort and prevent long-term damage. As your RV faces constant exposure to sun, rain, and temperature shifts, the insulation gradually loses its effectiveness. When that happens, you may notice higher energy usage, uneven indoor temperatures, or even early signs of moisture intrusion.
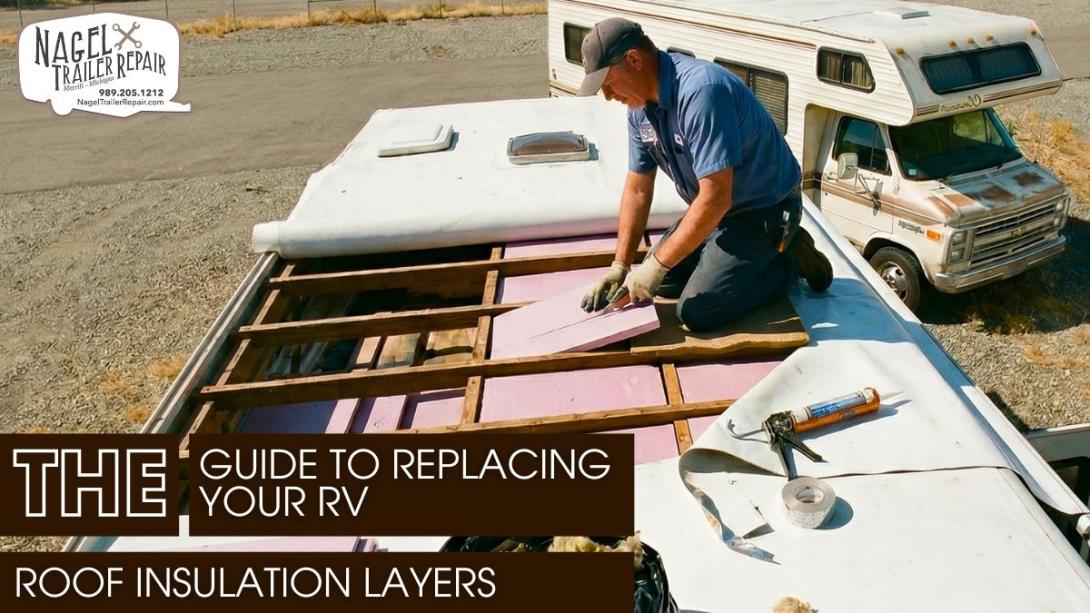
In this guide, we have discussed how to evaluate the condition of your existing insulation and spot warning signals like discoloration, soft spots, or musty odors. Addressing these issues early helps you avoid deeper structural concerns. We also covered the importance of removing compromised insulation carefully and preparing the roof surface to ensure a clean and stable base for new materials.
Selecting the right insulation can significantly impact your results. Rigid foam boards provide excellent durability and moisture resistance, while spray foam expands to fill gaps and create a tight seal. Fiberglass remains a cost-effective option when installed and sealed properly. The key lies in achieving a snug fit that eliminates air pockets and maximizes efficiency.
We also explored how sealing and weatherproofing protect your work. Applying sealants along seams and around fixtures prevents water from entering and damaging the new insulation. This step strengthens your roof’s ability to handle changing weather conditions.
If you’re planning RV roof repair in Michigan, combining insulation replacement with routine inspections can make a noticeable difference. Michigan’s climate demands a well-protected roof, and taking the time to upgrade your insulation helps ensure your RV stays comfortable, efficient, and ready for the road.