
If you own a 1973 to 1987 Chevy or GMC square body truck, you know the factory steering setup becomes the limiting factor the moment you install a lift kit. The push-pull linkage can't handle the angles, the tie rod hangs low enough to catch every rock on the trail, and the bump steer at highway speeds makes a K5 Blazer feel more like a rodeo bull than a roadworthy vehicle. The Square Body Crossover Steering Conversion is the permanent fix—a complete redesign of how your steering box connects to your tires. By flipping to crossover geometry with high-steer arm placement, you eliminate the root causes of bump steer, gain massive ground clearance, and upgrade every component to 1-ton strength. The East West Off Road kit packages this entire conversion into a single part number, with the intelligent twist of shipping without DOM tubing so you keep more cash in your pocket.
Understanding the Square Body Steering Problem
The 73-87 GM truck platform—K10, K20, K5 Blazer, and Suburban—rolled off the assembly line with a steering system that was adequate for a stock-height work truck on skinny tires. It was never designed to support a six-inch lift and 35-inch mud terrains. To fix it properly, you have to understand exactly what's wrong.
Push-Pull vs. Crossover: Why Geometry Matters
Factory square body steering uses a push-pull configuration. The steering box sits forward of the axle on the inside of the driver-side frame rail. The pitman arm swings forward and backward, pushing and pulling a drag link that connects to the driver-side knuckle. A second tie rod runs from the driver knuckle over to the passenger-side frame rail, where it attaches to a fixed idler bracket. This inverted-Y layout creates a fundamental problem: when the suspension cycles, the axle moves up and down, but the idler bracket stays fixed to the frame. The tie rod has to arc through space to accommodate this, and that arc changes your toe angle. The higher the lift, the more extreme the angle, and the worse the bump steer becomes.
True crossover steering eliminates the idler bracket entirely. The drag link runs from the pitman arm directly to the passenger-side knuckle. A full-length tie rod connects the two knuckles together behind the axle. Now, when the suspension cycles, the drag link and the suspension links move in matching arcs. Toe stays consistent. Bump steer vanishes. The steering wheel returns to center predictably after every turn. It's not a band-aid—it's a mechanical correction.
The Vulnerability of Low-Hanging Steering
Even if the factory geometry didn't create bump steer problems, the physical placement of the tie rod is a disaster for any truck that leaves pavement. The tie rod hangs several inches below the axle centerline, completely exposed. It's the first thing to hit a rock, the first thing to catch a stump, and the most common trail break on a square body front end. A crossover conversion with high steer arms relocates the tie rod above the axle centerline, tucked behind the differential housing. It gains several inches of clearance without changing your ride height one bit.
The Complete Conversion: More Than Just a Steering Arm Swap
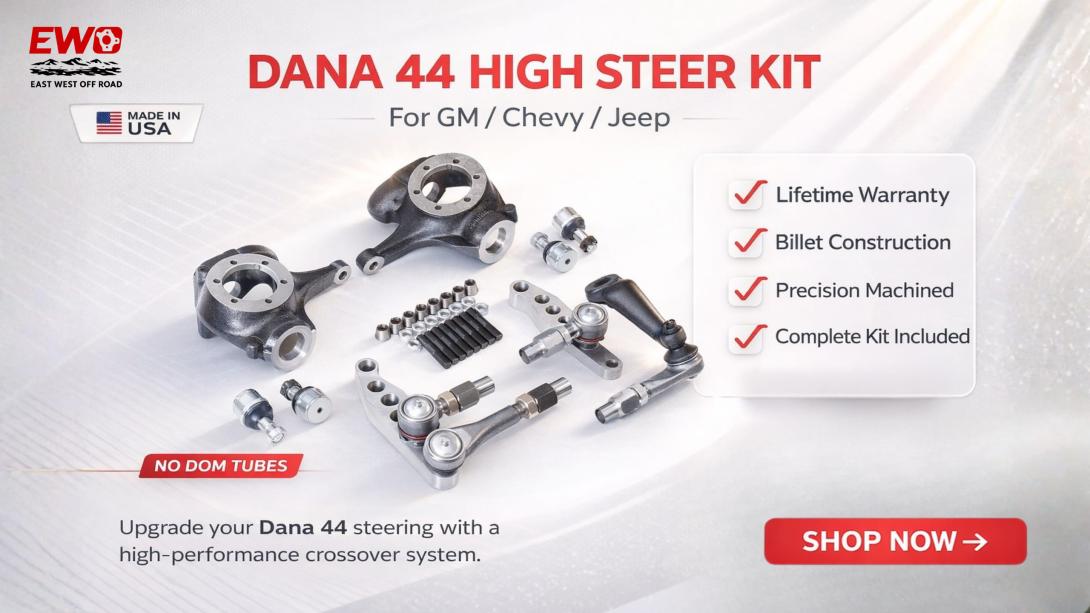
A proper square body crossover conversion touches every component between the steering wheel and the tires. The Dana 44 High Steer Kit from East West Off Road addresses this comprehensively, including the knuckles, steering arms, rod ends, ball joints, pitman arm, and all mounting hardware.
Flat Top Knuckles: The Non-Negotiable Foundation
You cannot bolt a high steer arm to a factory square body knuckle. The stock knuckle has a curved, radiused top surface that provides zero flat contact area for a steering arm. Attempting to drill and tap this surface is dangerous—the casting isn't thick enough, the curved surface prevents proper bolt seating, and the resulting stress concentrations inevitably crack the knuckle. The EWO kit includes USA-machined Dana 44 Flat Top Knuckles with precision-milled mounting pads. These castings have additional material in the pad area specifically to accommodate steering arm studs, and the flat surface provides 100% contact with the arm for a connection that handles stress through friction rather than bolt shear alone.
Driver and Passenger Side Matched Knuckles
The kit provides both Dana 44 driver passenger flat top knuckles as a matched pair, machined in the same setup to ensure identical pad height and stud spacing. This matters because the tie rod connects both knuckles directly—any height discrepancy between the left and right steering arm mounting surfaces creates an angular misalignment that eats tie rod ends. The bottom down taper knuckle Dana 44 configuration orients the tapered stud holes with the wide end down, so when the studs are torqued from above, the conical washers wedge into the taper and physically cannot back out.
1.25-Inch Billet Steering Arms
The steering arms included in the EWO kit are machined from solid domestic billet aluminum—not cast, not forged, not imported. At 1.25 inch thick billet steering arms, the cross-section resists the twisting forces that make thinner arms flex under load. When you're wedged against a rock and cranking the steering wheel with hydraulic assist, that rigidity translates directly to the tire. The arms carry a lifetime warranty because the material science is settled: properly machined billet of this thickness doesn't fail on a Dana 44.
1-Ton Tie Rod Ends Throughout
Every rod end in the kit is a standard GM 1-ton replacement part. The tie rod uses ES2234L ES2234R tie rod ends, and the drag link uses ES2026R ES2027L drag link ends. These are not proprietary heim joints that require mail-order replacement. They're off-the-shelf parts available at any auto parts store in North America. The 7/8-18 thread shanks thread into the included weld bungs, and the tapered studs seat into the steering arms and pitman arm with zero adapter sleeves required.
Planning Your Conversion: What You Need Before Starting
A successful square body crossover conversion requires more than just the kit components. Here's what to line up before you turn the first wrench.
The 2WD Steering Box Requirement
This is the single most common mistake, and it's dangerous enough to warrant its own section. The factory 4WD steering box on a square body turns the pitman arm rearward to operate the push-pull linkage. Crossover steering requires the pitman arm to point forward, pushing the drag link toward the front bumper and over to the passenger knuckle. A 2WD box crossover steering kit configuration solves this—the 2WD steering box has the correct sector shaft rotation for forward-swing operation. If you install crossover steering with the 4WD box, your steering inputs will be completely reversed. Turn the wheel left, the tires go right. Source a remanufactured 2WD steering box before you start. They're readily available and bolt directly to the factory frame mounting holes.
Sourcing DOM Tubing Locally
The EWO kit ships without DOM tubing to save you serious money on freight. Eight-foot lengths of steel pipe trigger dimensional weight surcharges that can exceed $150—often triple the cost of the material itself. The EWO complete high steer kit without DOM approach puts that decision in your hands. You'll need 1.5-inch OD DOM tubing with a .25-inch wall thickness for most applications. Any local steel supplier or off-road fabrication shop carries this. You'll need roughly six feet total for a standard-width Dana 44, but measure your specific axle before cutting. The kit includes all four threaded weld bungs (two left-hand thread, two right-hand thread) and matching jam nuts.
Tools and Workspace
You'll need a ball joint press (rentable from most auto parts stores), standard hand tools including large wrenches for the 7/8-inch jam nuts, a torque wrench, and access to a welder capable of penetrating .25-inch DOM. A 220-volt MIG machine with proper joint preparation is the minimum. If welding isn't something you do, any fabrication shop can weld the bungs into your DOM for a small fee. The rest of the installation is bolt-on.
Step-by-Step Installation Walkthrough
The conversion is a weekend project for a competent home mechanic. Take your time, follow the sequence, and don't skip any torque checks.
Knuckle Removal and Ball Joint Replacement
Start with the front axle on jack stands and the wheels removed. Pull the brake calipers and hang them out of the way without stressing the brake hoses. Remove the hubs, rotors, spindles, and axle shafts. Unbolt the factory steering linkage and set it aside—you won't reuse any of it. Remove the old knuckles using a pickle fork or ball joint separator. Press the old ball joints out of the inner C's. This is often the most physically demanding part of the job, especially on a truck that's seen decades of weather. Heat and penetrating oil are your allies.
Press the new Dana 44 upper lower ball joints into the inner C's, making sure the upper and lower go into their respective positions—they're different sizes and only fit one way. Torque the ball joint nuts to factory specification and install the cotter pins.
Flat Top Knuckle Installation
Slide the new EWO flat top knuckles onto the ball joint studs. Torque the lower ball joint nut first, then the upper. The knuckle should rotate smoothly through its full range without vertical play. If it binds, the ball joints may not be fully seated. If there's play, recheck your torque.
Steering Arm Mounting
Place the billet steering arms on top of the flat top knuckle pads. Insert the 9/16"-18 studs through the arms and into the knuckles. Place a conical washer under each nut, with the tapered side facing down into the knuckle. Torque the nuts in a cross pattern to the manufacturer's specification. The conical washers will self-center as they seat. Do not skip the conical washers or substitute flat washers—the taper lock is what prevents the studs from vibrating loose.
Steering Box Swap
Remove the factory 4WD steering box and install the 2WD replacement. The bolt pattern matches the frame. Install the included 3 inch drop pitman arm 32 splines onto the 2WD box sector shaft. This arm is fully indexable, meaning you can clock it to the optimal position for your ride height rather than being stuck with whatever clocking the manufacturer chose. The pitman arm should point roughly forward at center steering position.
DOM Fabrication and Final Assembly
Measure the distance between the knuckle steering arms for your tie rod length. Cut the DOM tubing slightly long—you can always trim more, but you can't add material back. Mock up the tie rod with the bungs loosely inserted and the rod ends threaded in a few turns. Install it between the knuckles and check clearance to the differential cover through the full steering range. Once satisfied, tack the bungs in place, remove the assembly, and complete the welds on the bench. Repeat the process for the drag link, running from the pitman arm to the passenger-side steering arm.
Thread the jam nuts onto the bungs, thread the rod ends in, set your toe to approximately 1/8-inch toe-in, and lock the jam nuts down. Center the steering wheel by adjusting the drag link length—the indexable pitman arm makes fine-tuning straightforward.
Alignment and Shakedown
With everything assembled, cycle the steering lock to lock with the engine running. Check for binding, interference, or contact with brake lines, frame rails, or the differential. Road test at low speed first, gradually working up to highway speeds. Re-torque all fasteners after the first 50 miles and again after the first trail run.
On-Road and Off-Road Driving Impressions
The transformation behind the wheel is immediate and dramatic.
Highway Manners Restored
The wandering, darting, and constant steering corrections that plague lifted square bodies disappear with proper crossover geometry. The truck tracks straight through pavement undulations that previously required sawing at the wheel. Lane changes become precise. The dead zone in the center of the steering wheel—that loose, vague feeling where small inputs do nothing—tightens up because the crossover linkage has no idler arm slop to absorb steering input.
Trail Performance Transformed
Off-road, the benefits are even more pronounced. A tire wedged against a rock no longer deflects the steering linkage because the solid DOM tie rod locks both knuckles together mechanically. You can steer with precision even under load. The relocated tie rod clears obstacles that would have crushed the factory linkage. And if you do manage to break something, the Chevy 3/4 ton tie rod arms and ES-series rod ends mean a replacement is a parts store run away, not a week-long mail order wait.
Why the EWO Kit Is the Right Choice for Square Body Owners
The off-road aftermarket offers plenty of ways to spend money on steering upgrades. What makes the Chevy Dana 44 Crossover Steering Kit from East West Off Road different is the completeness of the solution.
Engineered as a System
Every component in the EWO kit is machined to work with every other component. The flat top knuckle pad dimensions match the billet arm footprint. The taper angles on the knuckle stud holes match the conical washers exactly. The tie rod end thread pitches match the weld bungs. There's no mixing parts from different manufacturers, no discovering mid-install that a taper angle is slightly off, no shimming or modifying to make things fit. This is a Dana 44 Steering Knuckle Kit in the truest sense—a unified system designed to be installed together.
Domestic Manufacturing and Lifetime Warranty
The knuckles and steering arms are machined in the United States from domestic materials. This isn't an imported kit with questionable metallurgy and vague quality control. The billet arms carry a lifetime warranty, and the entire kit is built to standards that make that warranty more than a marketing claim.
The "Without DOM" Advantage
The 1 ton steering without DOM tubing shipping model is a genuinely customer-friendly decision. You're not paying freight on commodity steel pipe. You get every precision component in a reasonably sized box, and you source the tubing locally. For builders working on custom-width axles or non-standard setups, this also means you can cut your DOM to the exact length your application requires rather than being stuck with pre-cut lengths designed for a different truck.
Complete Off-Road Crossover Steering System
Whether you're building a dedicated rock crawler, restoring a K5 Blazer for weekend adventure, or turning a K20 into an overlanding rig, the Off Road Crossover Steering System from EWO provides the steering precision and durability that the factory setup never delivered. It's the foundation for everything else you'll do to the truck—bigger tires, more horsepower, harder trails—because none of that matters if you can't steer accurately.
Frequently Asked Questions (FAQs)
What exactly is a square body crossover steering conversion?
It's a complete replacement of the factory push-pull steering linkage with a crossover system. The drag link connects from the steering box pitman arm directly to the passenger-side knuckle, and a full-length tie rod connects both knuckles together. Combined with high steer arms that relocate the linkage above the axle, this eliminates bump steer, improves ground clearance, and upgrades all components to 1-ton strength.
Can I do a crossover conversion without changing my knuckles?
No. The factory square body knuckles have curved top surfaces that cannot safely mount a steering arm. Flat top knuckles with machined mounting pads are required. Drilling and tapping stock knuckles is dangerous and will eventually crack the casting. The EWO kit includes proper USA-made flat top knuckles.
Why does the kit ship without DOM tubing?
Shipping eight-foot lengths of steel tubing is expensive due to dimensional weight surcharges. By excluding DOM from the kit, EWO saves you $100 to $150 in freight costs. You can purchase the same material locally for around $30. The kit includes all weld bungs, jam nuts, and rod ends—everything except the raw tubing.
Do I really need a different steering box?
Yes. The factory 4WD steering box has sector shaft rotation designed for push-pull steering with the pitman arm swinging rearward. Crossover steering requires the pitman arm to swing forward. A 2WD steering box provides the correct rotation. If you retain the 4WD box, your steering will be reversed.
How long does the conversion take?
Plan for a full weekend if you're working alone with standard tools. The job involves removing the old steering, pressing out old ball joints, pressing in new ones, mounting the knuckles and arms, swapping the steering box, fabricating the DOM links, and performing an alignment. Having a helper and access to a ball joint press and welder will speed things up.
Will this conversion work on a lifted square body?
Absolutely. In fact, lifted trucks benefit the most from crossover steering because the factory push-pull geometry degrades severely with lift height. The included 3-inch drop pitman arm helps maintain proper drag link angle, and the indexable design allows fine-tuning for your specific lift.
Are replacement tie rod ends easy to find?
Yes. The ES2234L, ES2234R, ES2026R, and ES2027L are standard GM 1-ton replacement parts. Any auto parts store in the United States stocks them or can have them within hours. This is a major advantage over kits that use proprietary heim joints requiring mail-order replacement.
Does the conversion affect my turning radius?
Crossover steering typically maintains or slightly improves turning radius compared to a worn factory system. The solid linkage eliminates the slop that reduces effective steering angle, so you get the full sweep the steering box provides. Clearance to the leaf springs or frame should be verified at full lock during installation.